 Yum is a package manager used on Red Hat, CentOS, and other Linux distributions that use RPM Package Manager. Yum is used to install, update, delete, or otherwise manipulate the packages installed on these Linux systems. In this tutorial, we will cover the yum update command – what it is, how to use it, and all the different commands you may need to know when you wish to upgrade the installed packages on your system. Yum update is the command used to update applications installed on a system. If the command is run without any package names specified, it will update every currently installed package on the system. When running this command, yum will begin by checking its repositories for updated version of the software your system currently has installed. The screenshot below shows the type of output you’ll typically see when first issuing the yum update command.
How does yum update work?
Yum update is the command used to update applications installed on a system. If the command is run without any package names specified, it will update every currently installed package on the system.
yum update
When running this command, yum will begin by checking its repositories for updated version of the software your system currently has installed. The screenshot below shows the type of output you’ll typically see when first issuing the yum update command.
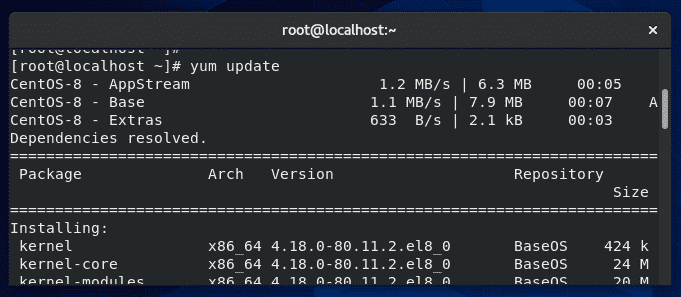
As you can see, the output from yum first lists the repositories it’s querying, which are the default ones for CentOS: AppStream, Base, and Extras. Below that, yum lists the various packages which it has found updates for.
At the tail end of this output, yum will display the “Transaction Summary,” which shows the total number of packages that are to be installed and upgraded.
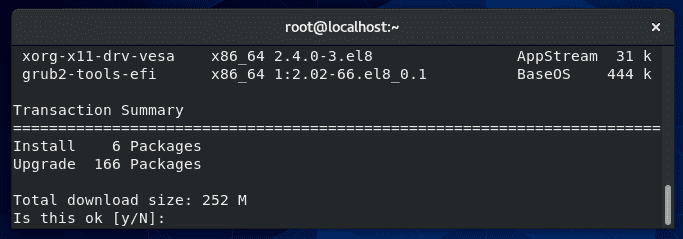
In this example, 166 packages are being upgraded, and 6 new packages are being installed.
In case you’re wondering why new packages are being installed when we are only supposed to be upgrading applications, some new software packages may have become part of this Linux distribution, or some upgraded applications may rely on extra packages that are not yet installed.
Once you review the list of software that yum plans to upgrade, you can confirm these changes by typing “y” and hitting enter.
Yum will then perform the upgrades, which may take some time depending on the speed of your connection and the system itself.
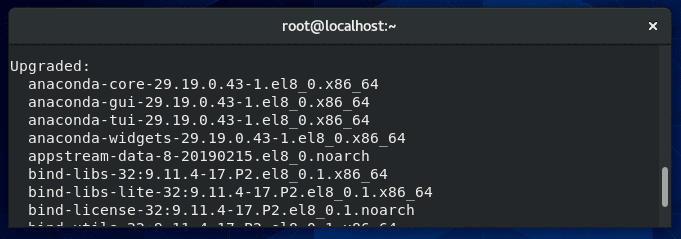
Once it has finished, you’ll get a final summary which will list all the packages that were successfully upgraded, as well as any errors that may have been encountered.
Update without gpg checking
GPG keys are used to verify the authenticity of an RPM package. The –nogpgcheck option in yum will instruct it to skip checking GPG signatures on packages. This is useful in cases where you have an unsigned package or you just don’t have the GPG key.
yum update --nogpgcheck
This is a quick solution if you encounter an error like “Package NameOfPackage.rpm is not signed .. install failed!” when running the normal yum update command. The –nogpgcheck option will ignore this warning and proceed with upgrading the package anyway.
Update from a local repo
It’s possible to set up local repositories for yum to query when it does an update. This is often done if you want to use yum to update packages that aren’t included in the default repos, or if you need to upgrade an offline system.
First, place all your updated RPM files in a new folder. In this example, we’ll use /root/rpms.
Next, navigate to the following directory where you can see all the repo files for yum:
cd /etc/yum.repos.d
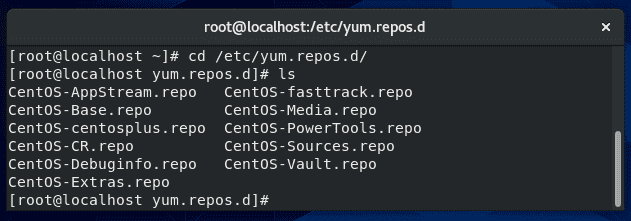
To set up a local repo, create a new file in this directory.
vi MyRepo.repo
Inside your repo file, configure it in this format, changing the lines as necessary:
[MyRepo]
name=My Local Repo
baseurl=file:///root/rpms
enabled=1
gpgcheck=0
The big difference between a local repo and a remote repo is in the “baseurl” line, where the file:// protocol is specifying a local file, as opposed to the remote protocols http:// or ftp://
Once the file has been saved, apply the correct permissions:
chmod 644 MyRepo.repo
The repository should now be ready to use. Be sure clear yum’s cache before attempting a yum update command:
yum clean all
Show patches
Yum can display available security patches, without installing them, with this command:
yum updateinfo list security

If no output is returned, like in the screenshot above, this means there are no security patches available for any installed software on your system.
Update a single package
If you need to update a certain package without running an update for every application installed, just specify the name of the package in your yum update command.
yum update name-of-package
Multiple packages can be specified, separated by a space. You need to have the name of the package typed perfectly in order for yum to find it in its repositories; if you’re not sure of a package name, first check what packages are currently eligible for updates:
yum check-update
Update all but one package
If you need to run the yum update command but you wish to exclude a package from being updated, you can specify the –exclude option.
A common situation where administrators may find this necessary is with kernel updates, since these are major updates that could cause unpredictable errors on a production server. However, they may still want to run the command to update less sensitive applications.
To exclude a package (in this example, those related to the kernel):
yum update --exclude=kernel*
The asterisk acts as a wildcard, in case there are multiple related packages or you don’t know the full name of the package.
Alternatively:
yum update -x 'kernel*'
Exclude multiple packages
You can exclude multiple packages with more –exclude flags.
yum update --exclude=kernel* --exclude=httpd
Use this flag as in the example above, or the -x flag, as many times as needed.
Check when last yum update ran
To see a list of yum transactions, with the date and time they were ran, use the yum history command.
yum history
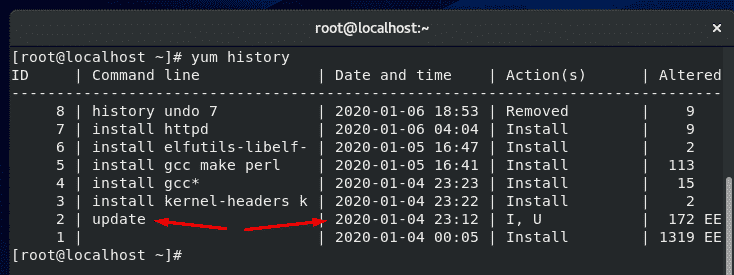
In the screenshot above, you can see that the last time yum updated software was on January 4th.
Rollback (revert) update
A great feature of yum is that it allows you to undo a recent update, thus restoring the upgraded packages to their previous versions.
Each yum action (install, update, erase, etc) is assigned a transaction ID, and this ID must be specified when undoing a yum update. To see a list of transaction IDs for recent yum operations, use this command:
yum history

In the screenshot above, you can see the last operation run with yum was to install the httpd package. Undoing an installation or an update works the same way, so in this example, we will undo this recent installation of httpd. As shown in the screenshot, this transaction has an ID of 7.
To undo this change and roll back the program to its previous version, issue this command:
yum history undo 7
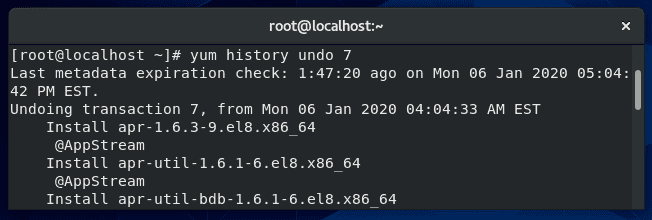
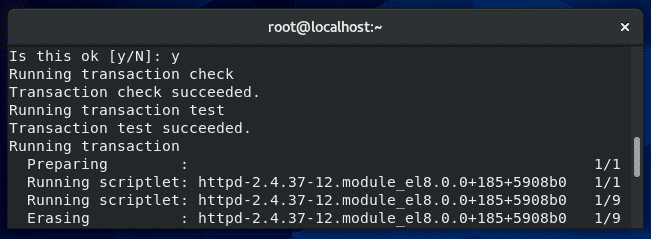
As usual, yum will summarize the changes to be made and ask if you’d like to proceed with a Y/N prompt. Enter Y and the specified transaction will be undone.
Clean up a failed yum update (Troubleshooting)
If one or more packages fail to upgrade successfully when you run the yum update command, the system can end up with duplicate packages installed (2 versions of the same program).
Sometimes, following the rollback instructions in the section above can fix the problem. If that doesn’t work, you can remove duplicate packages on your system with this command:
package-cleanup --dupes
Yum stores a cache of information for packages, metadata, and headers. If you encounter an error, clearing yum’s cache is a good first step in troubleshooting. Use the following command to do that:
yum clean all

Skip errors
When updating or installing a package, that package may require additional software in order to run correctly. Yum is aware of these dependencies and will try to resolve them during updates by installing or upgrading the extra packages that are needed.
If yum has trouble installing the necessary dependencies, it produces an error and doesn’t proceed further. This is a problem if you have other packages that need to be updated.
To instruct yum to proceed with updating other packages and skipping the ones with broken dependencies, you can specify the –skip-broken command in your yum update command.
yum update --skip-broken
Get a list of packages that need an update
Running the yum update command as normal, with no additional options, will output a list of available updates.
yum update
If you’d like to see some additional information about the package updates available, type this command:
yum updateinfo
To see information about security updates that are available for the system, type this command:
yum updateinfo security
Difference between yum check updates and list update
Although the two commands sound similar, so there is a difference between checking for updates and listing updates in yum.
yum list updates
The command to list updates, shown above, will list all the packages in the repositories that have an update available. Keep in mind that some of the packages in the repositories may not even be installed on your system.
yum check-update
The command to check for updates, seen above, is a way to check for updates without prompting for interaction from the user. This is the command you would opt for if you were coding a script to check for updates, for example.
The check-update command will return an exit value of 100 if there are packages that have updates available, and it will return an exit value of 0 if there are no available updates.
A value of 1 is returned if an error is encountered. Use these exit codes to code your script accordingly.
Notify when updates are available
There are a few packages that can help manage yum updates on your system. Some can even notify administrators when yum has updates that are available to be installed. One such service is called yum-cron.
Install yum-cron using yum:
yum install yum-cron
Set the yum-cron service to start at boot:
systemctl enable yum-cron.service
systemctl start yum-cron.service
Configure the settings for yum-cron inside the configuration file using vi or your preferred text editor:
vi /etc/yum/yum-cron.conf
In this file, you can specify if the updates should be automatically applied or not. If you’d only like to receive notifications, fill out the email information inside the configuration file. Yum-cron will then send you an email anytime there are updates available for your system.
apply_updates = no #don’t apply updates automatically
email_from = root@localhost
email_to = admin@example.com
email_host = localhost
What port does yum update use
Yum uses port 80 when checking for updates. If you look inside the repository files on your system, you’ll see that all of the links inside begin with http.
If you need to create a rule in your firewall to allow yum to function, you need to allow port 80.
Yum update vs upgrade
So far, we have only talked about the yum update command in this tutorial, but there’s another very similar command: yum upgrade.
yum upgrade
There is a small difference between these two commands. Yum update will update the packages on your system, but skip removing obsolete packages.
Yum upgrade will also update all the packages on your system, but it will also remove the obsolete packages.
This inherently makes yum update the safer option, since you don’t have to worry about accidentally removing a necessary package when updating your software.
Use some discretion when issuing the yum upgrade command, since it may not preserve some packages that you are still using.
At last, I hope you find the tutorial useful.
keep coming back.


 Red Hat Enterprise Linux ile % 100
  Red Hat Enterprise Linux ile % 100 uyumlu bir GNU/Linux dağıtımı olan CentOS’un, Red Hat Enterprise Linux 7.1 kaynak kodlarından derlenen sürümü CentOS 7, Karanbir Singh tarafından duyuruldu. CentOS 7’yi duyurmaktan mutluluk duyduklarını söyleyen Singh; herkesin yayımladıkları